Drawing from Previous Experience
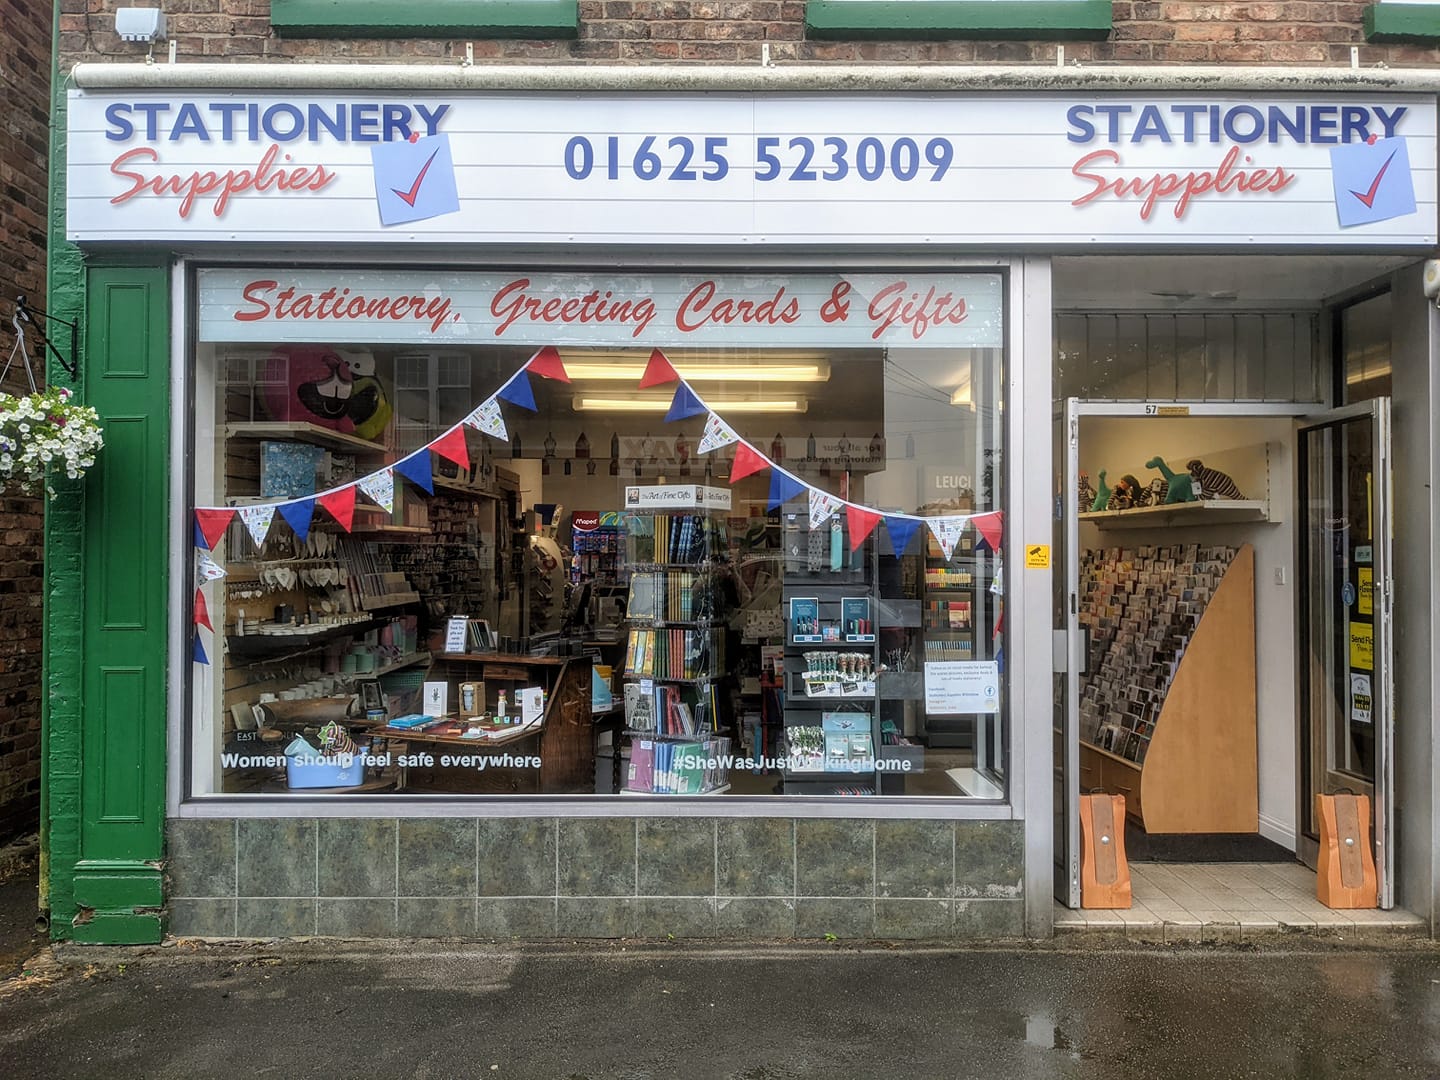
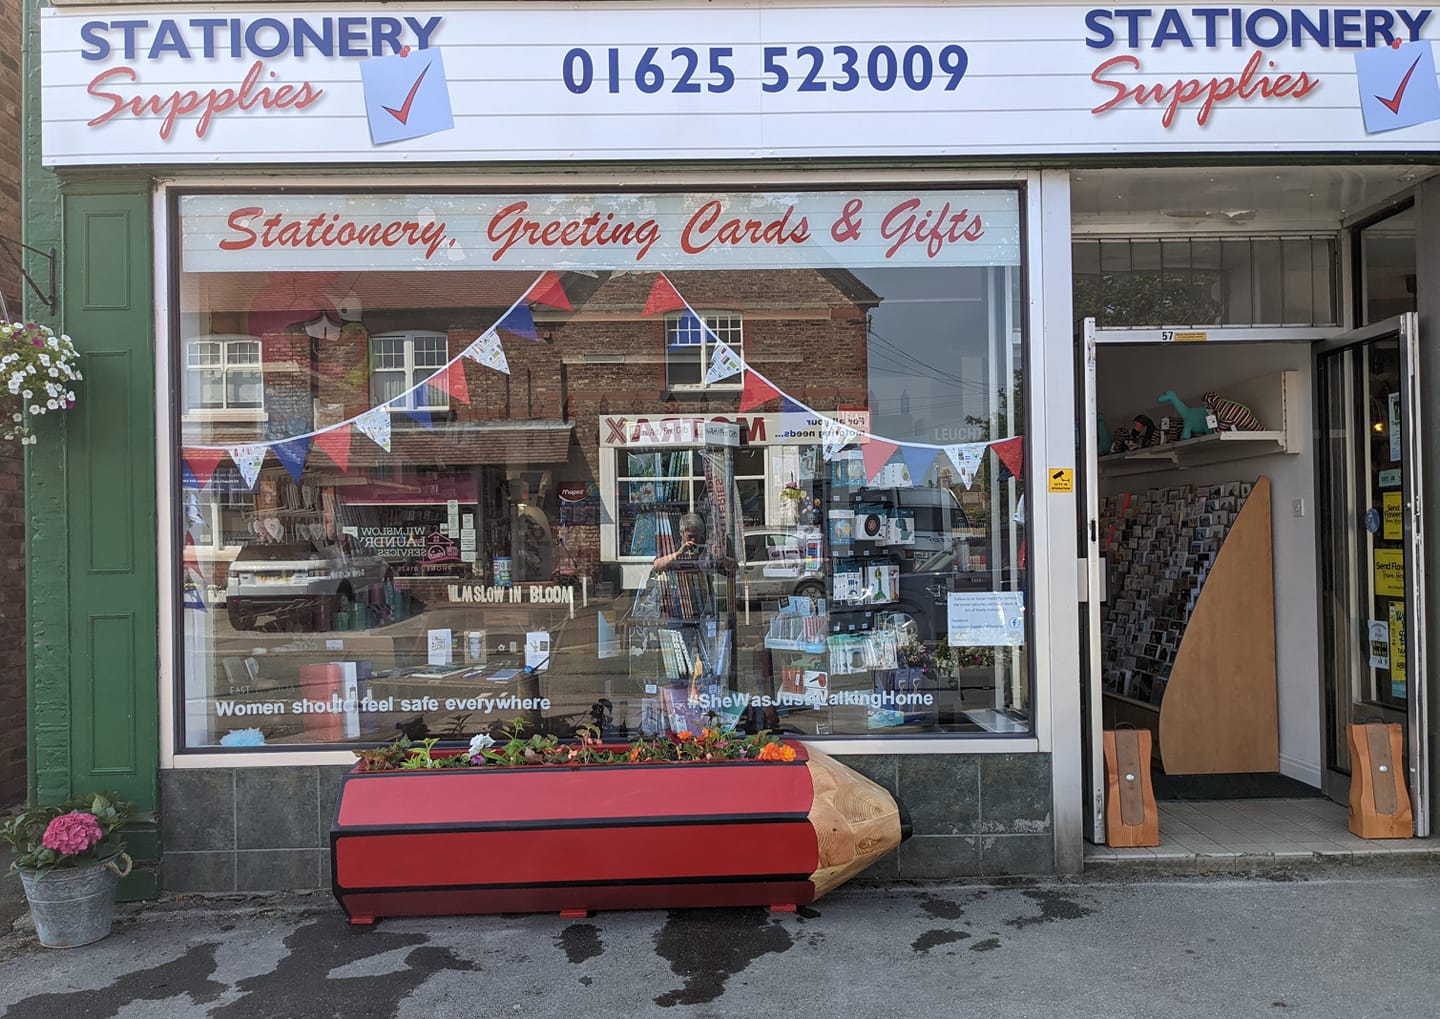
Being a joiner you can quite often get ‘drawn’ into making the same kinds of things week in week out. However, over the last year, it’s been so much fun creating such a varied portfolio of work. Well, you’d think it was varied until Sarah from Stationery Supplies in Wilmslow gets in touch!! Sarah recently opened a new store on Chapel Lane in Wilmslow, Cheshire. She decided she would like two door stops and a large planter. Knowing Sarah, these would be anything but ordinary, her passion for her business and stationery is inspiring and very contagious.
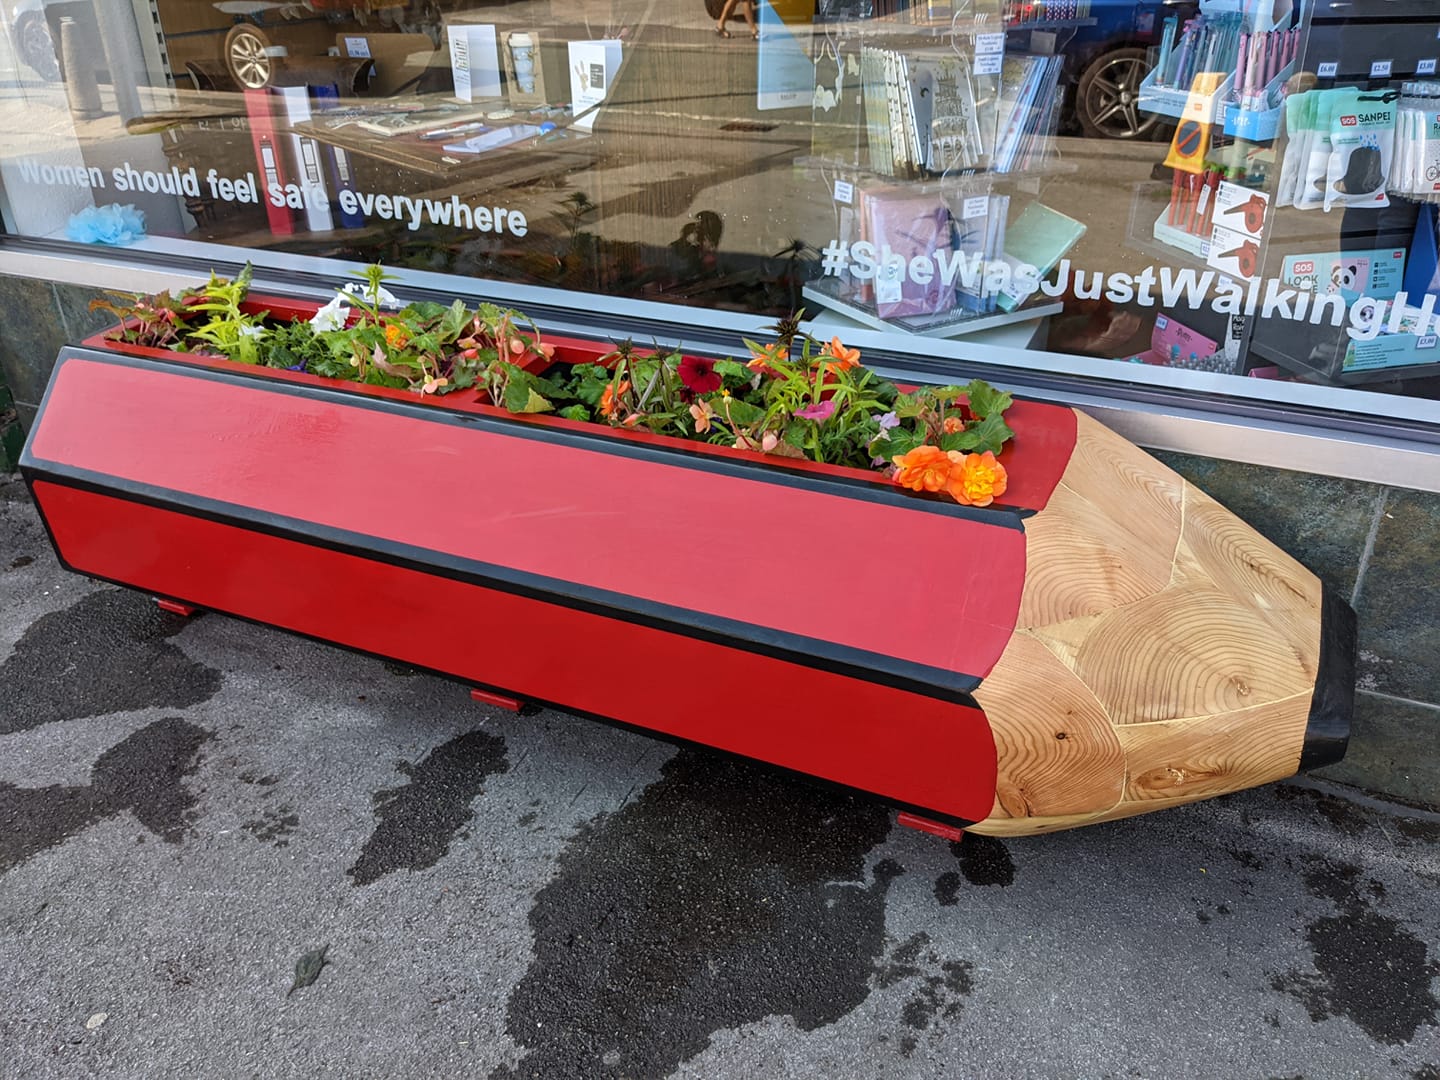
After a quick chat, we settled on the trademark pencil planter (similar to the one I made previously for the Marple store, which is based off the similar design and uses a similar colour pallet to the Staedtler Tradition Pencil) and two pencil sharpener doorstops. This may have seemed simple enough but I knew from experience that getting the scale and look of these types of item wasn’t going to be so easy but it is key to getting the items to look right.
A Sharp Project

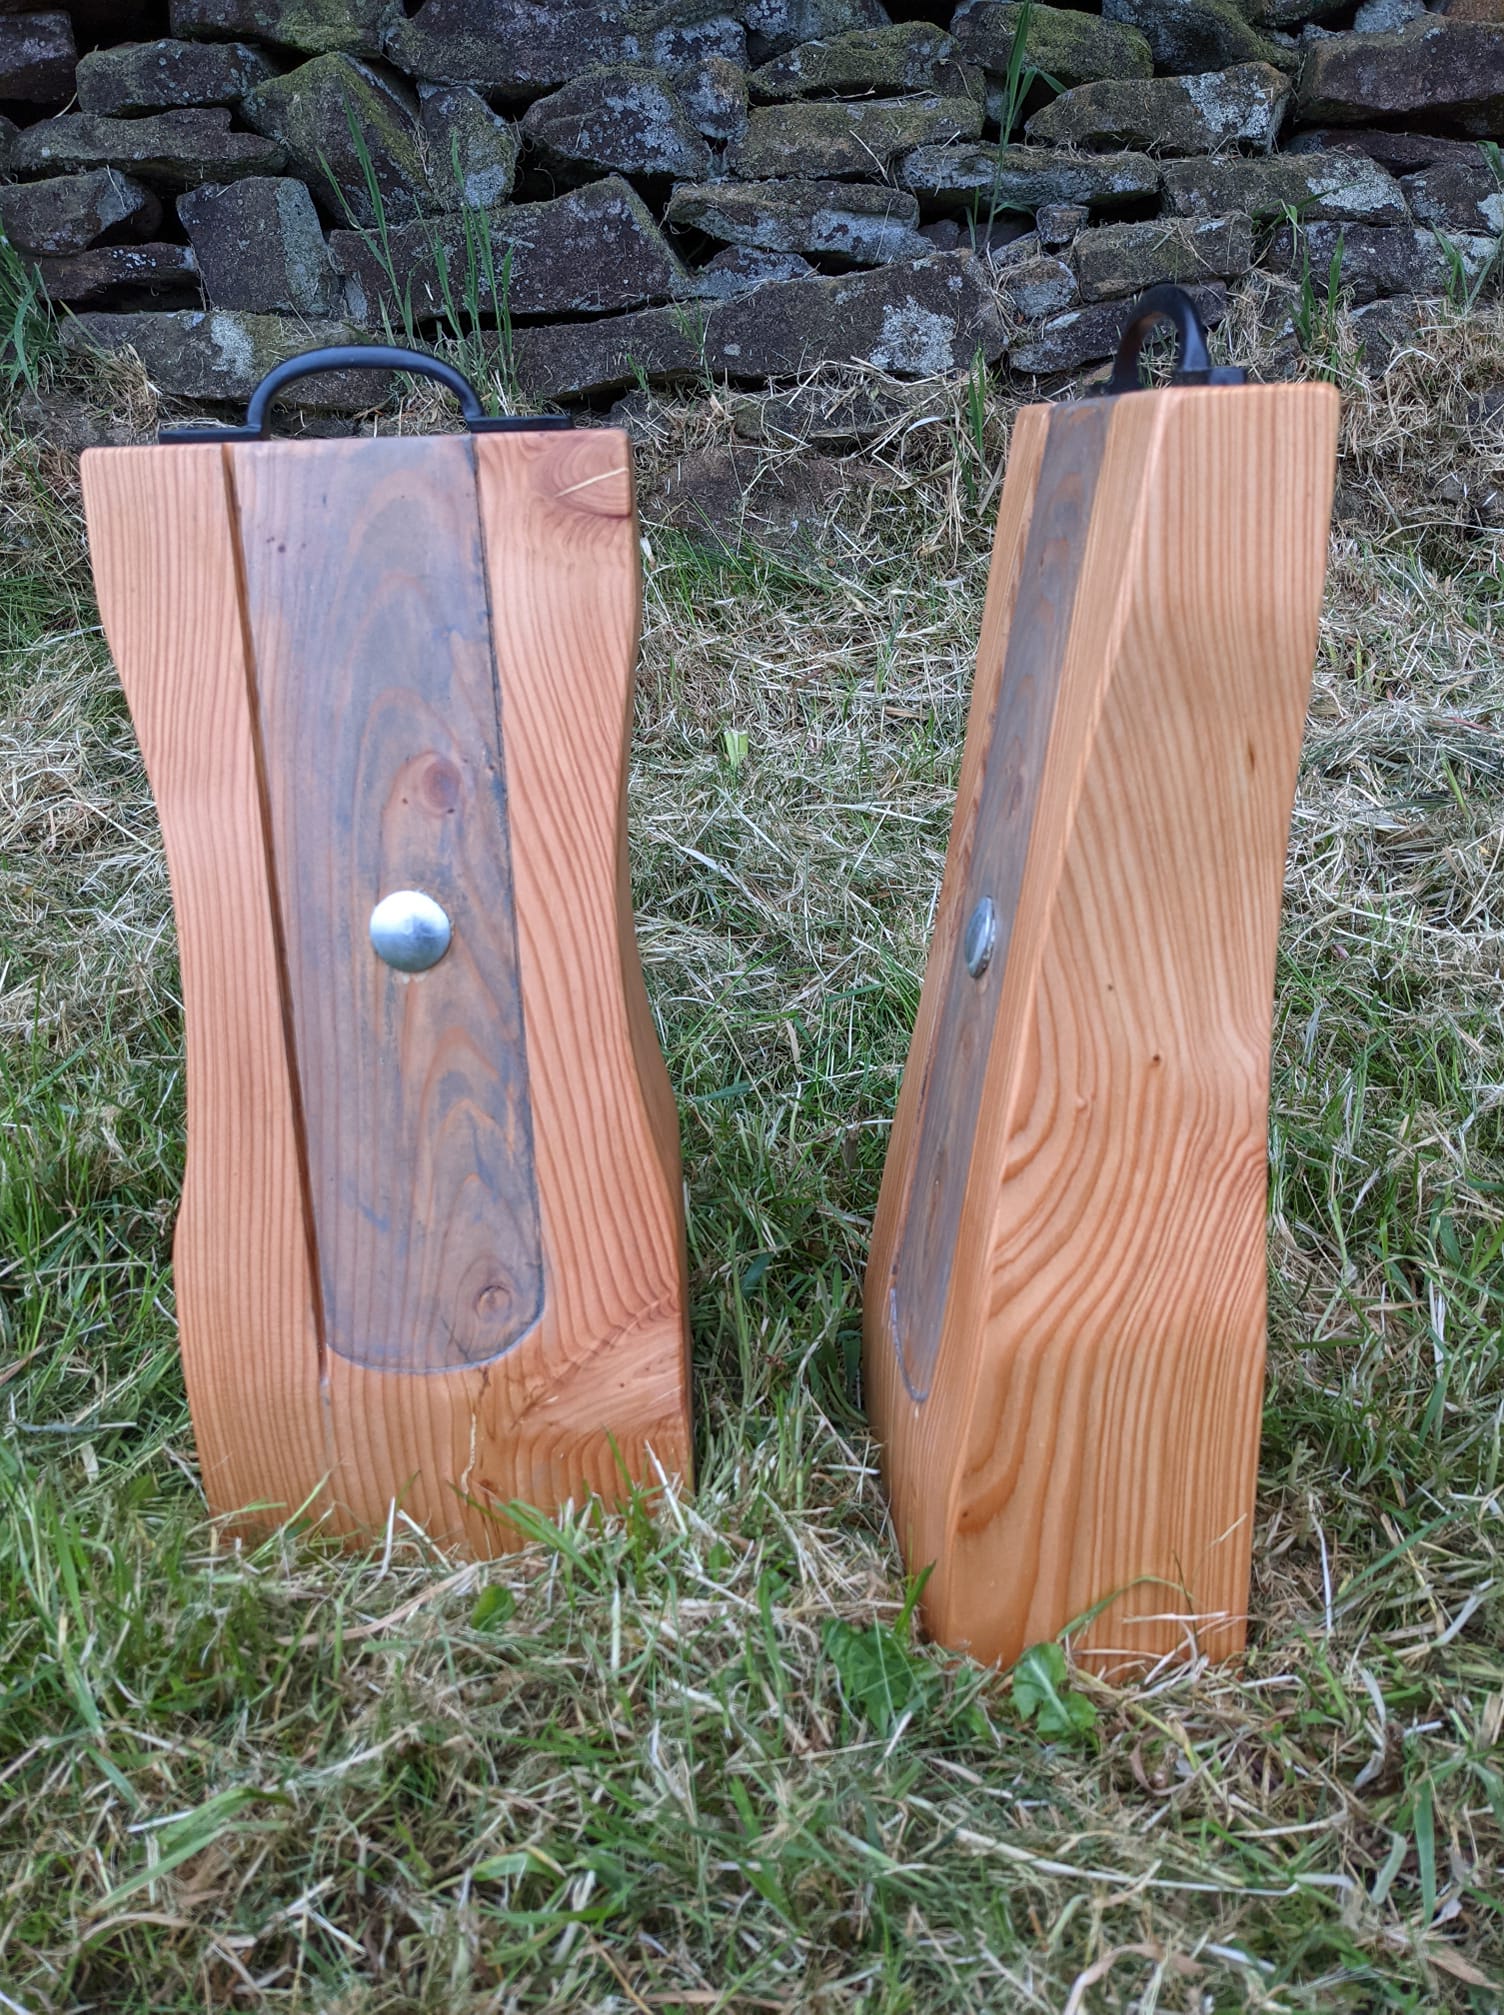
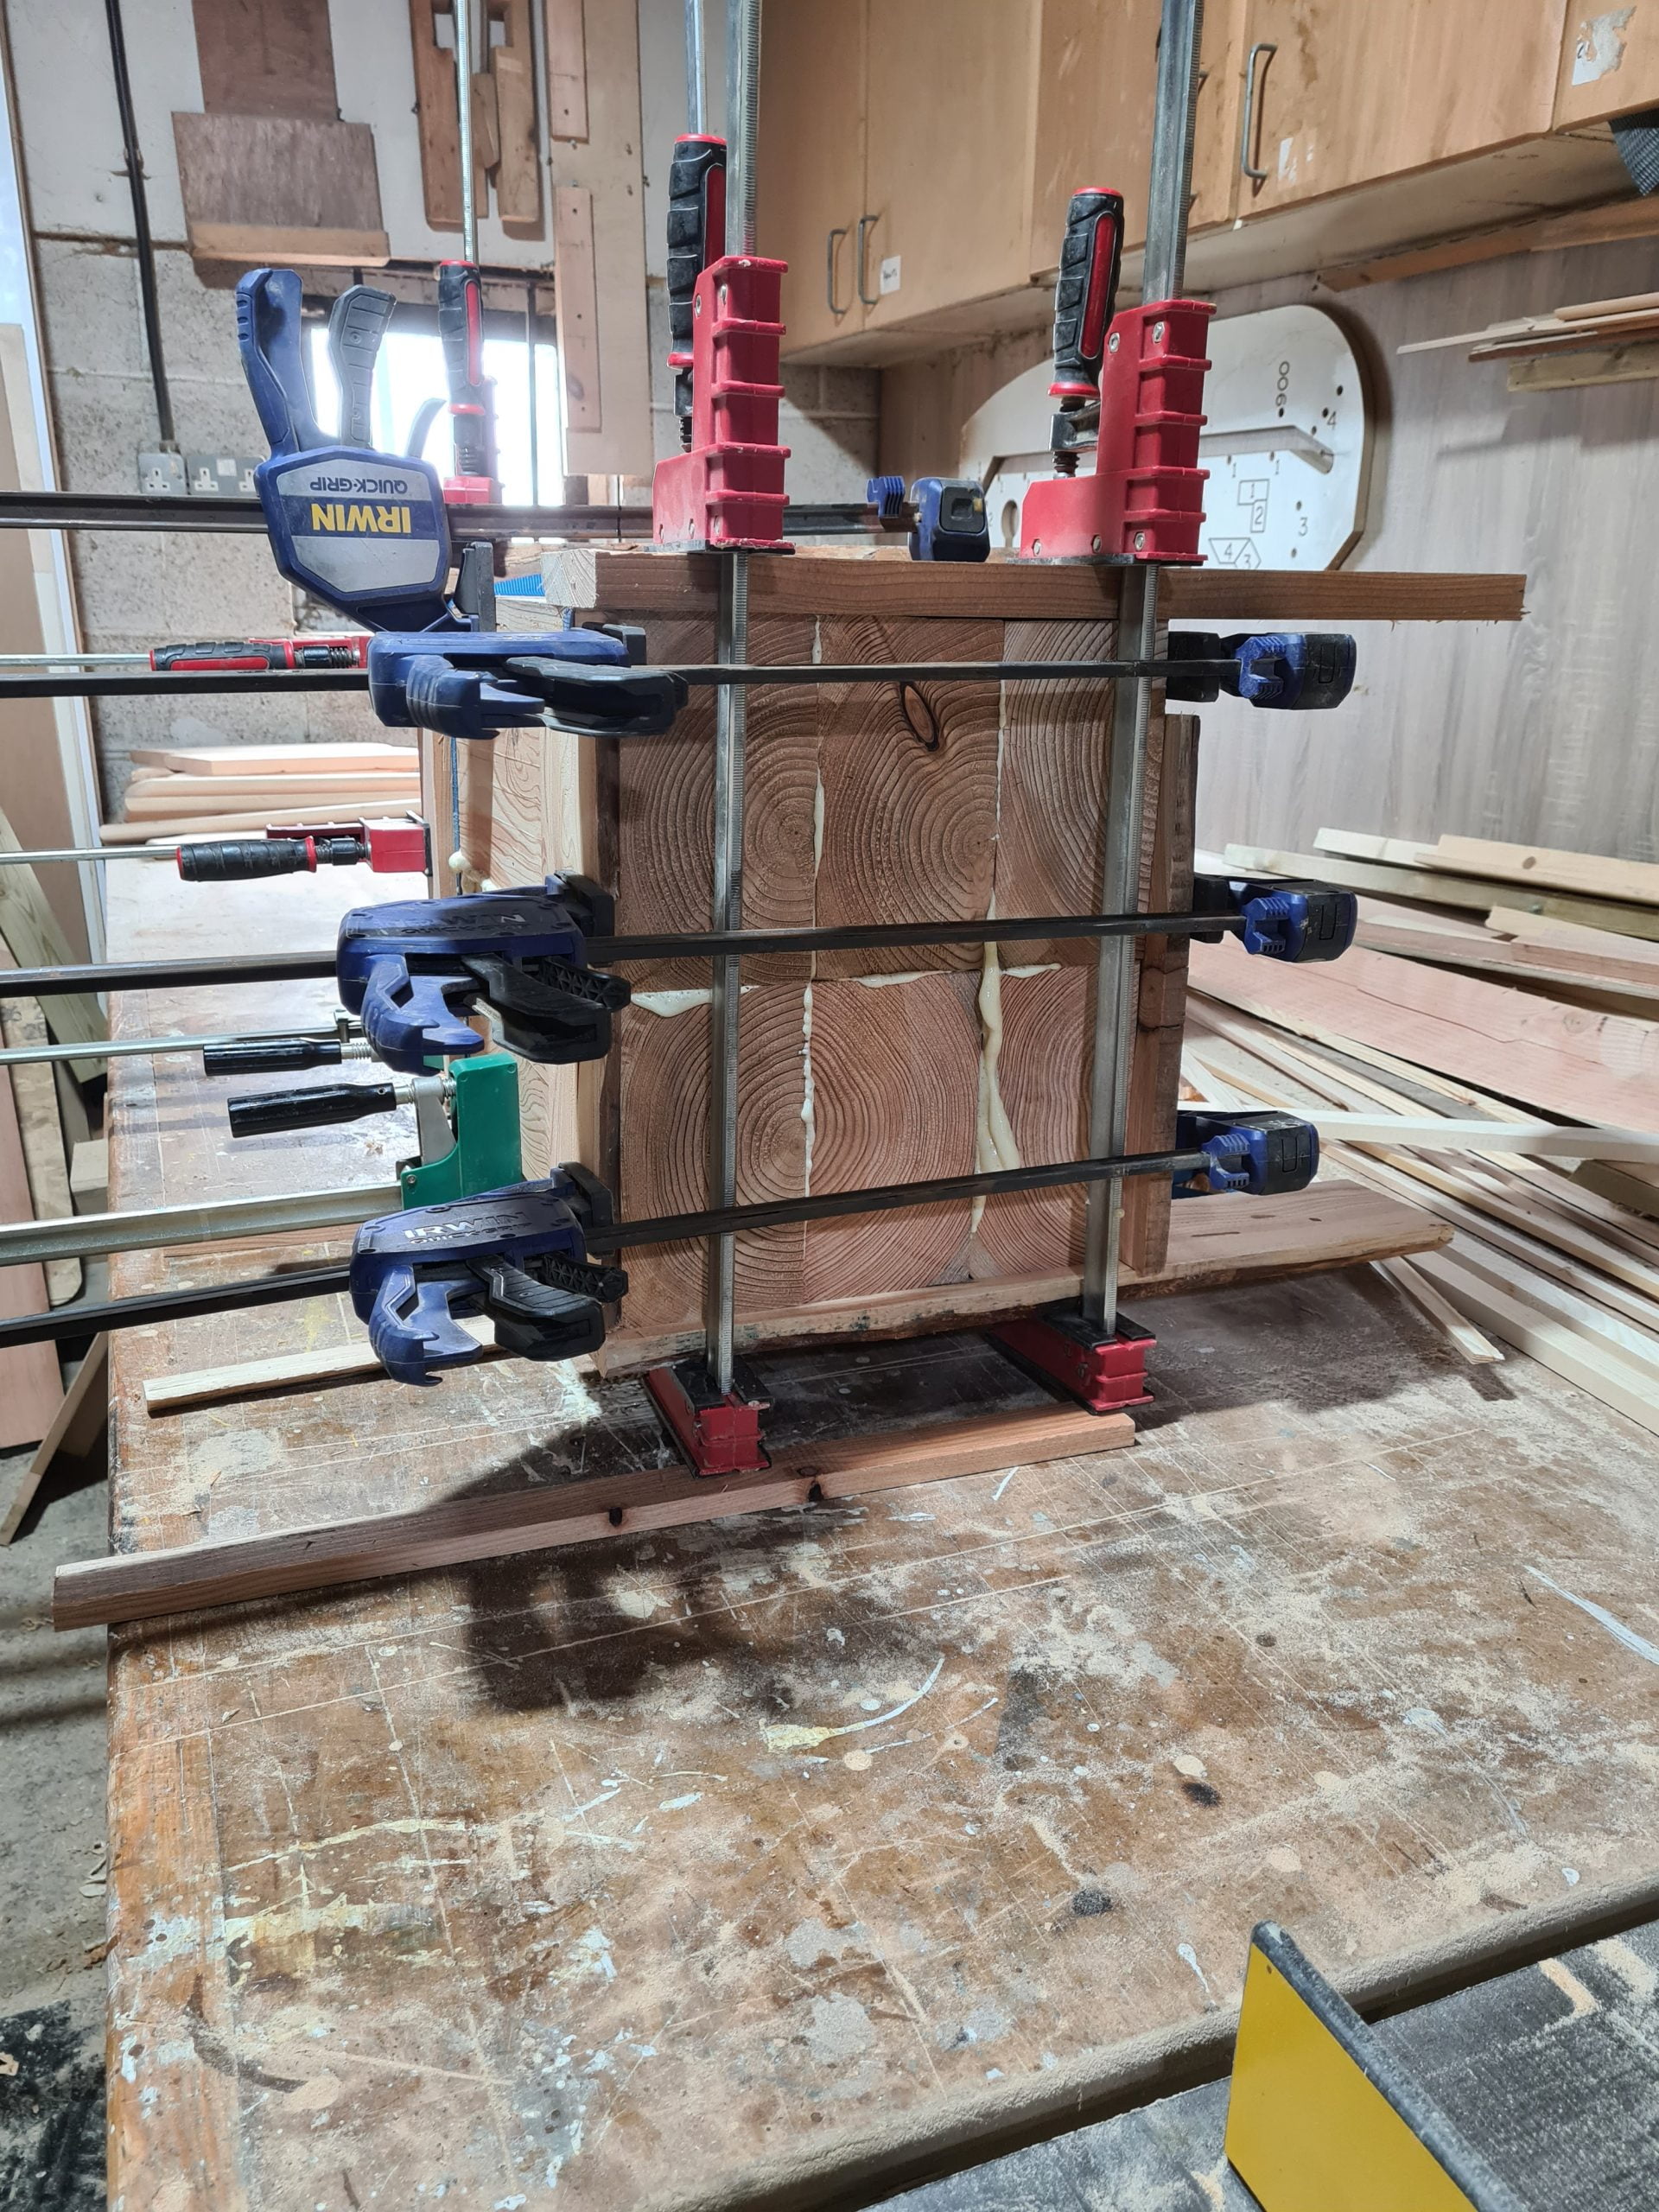
So we started off with the simpler of the two builds – the giant pencil sharpeners. For these, we took a look at a traditional Staedtler metal pencil sharpener. We needed to think creatively, and scaled them up to the largest timber profile I had in stock. This happened to be larch, with dimensions of some 200mm x 100mm x 450mm.
This type of free-thinking project benefits from progressing along a natural, organic flow. Specifications are often brief and with no drawings I can really be imaginative, putting heart and soul into each build. This can be both relaxing, since I can build with my passion, however stressful in the fear that it must meet or exceed my customers expectations.
For the build of the pencil sharpener we drew, shaped using a bandsaw, carved with a router, and sanded blanks into the pencil profile before staining. As a finishing touch before oiling, we also added a bolt head replicating a blade screw. Much to both of our pleasure upon collection, Sarah loved them, and it was time to start thinking bigger!!
2B or not 2B
A few weeks and a site visit later it was time to tackle the ‘GIANT PENCIL’. Due to the size of the undertaking, we split the project into three sections:
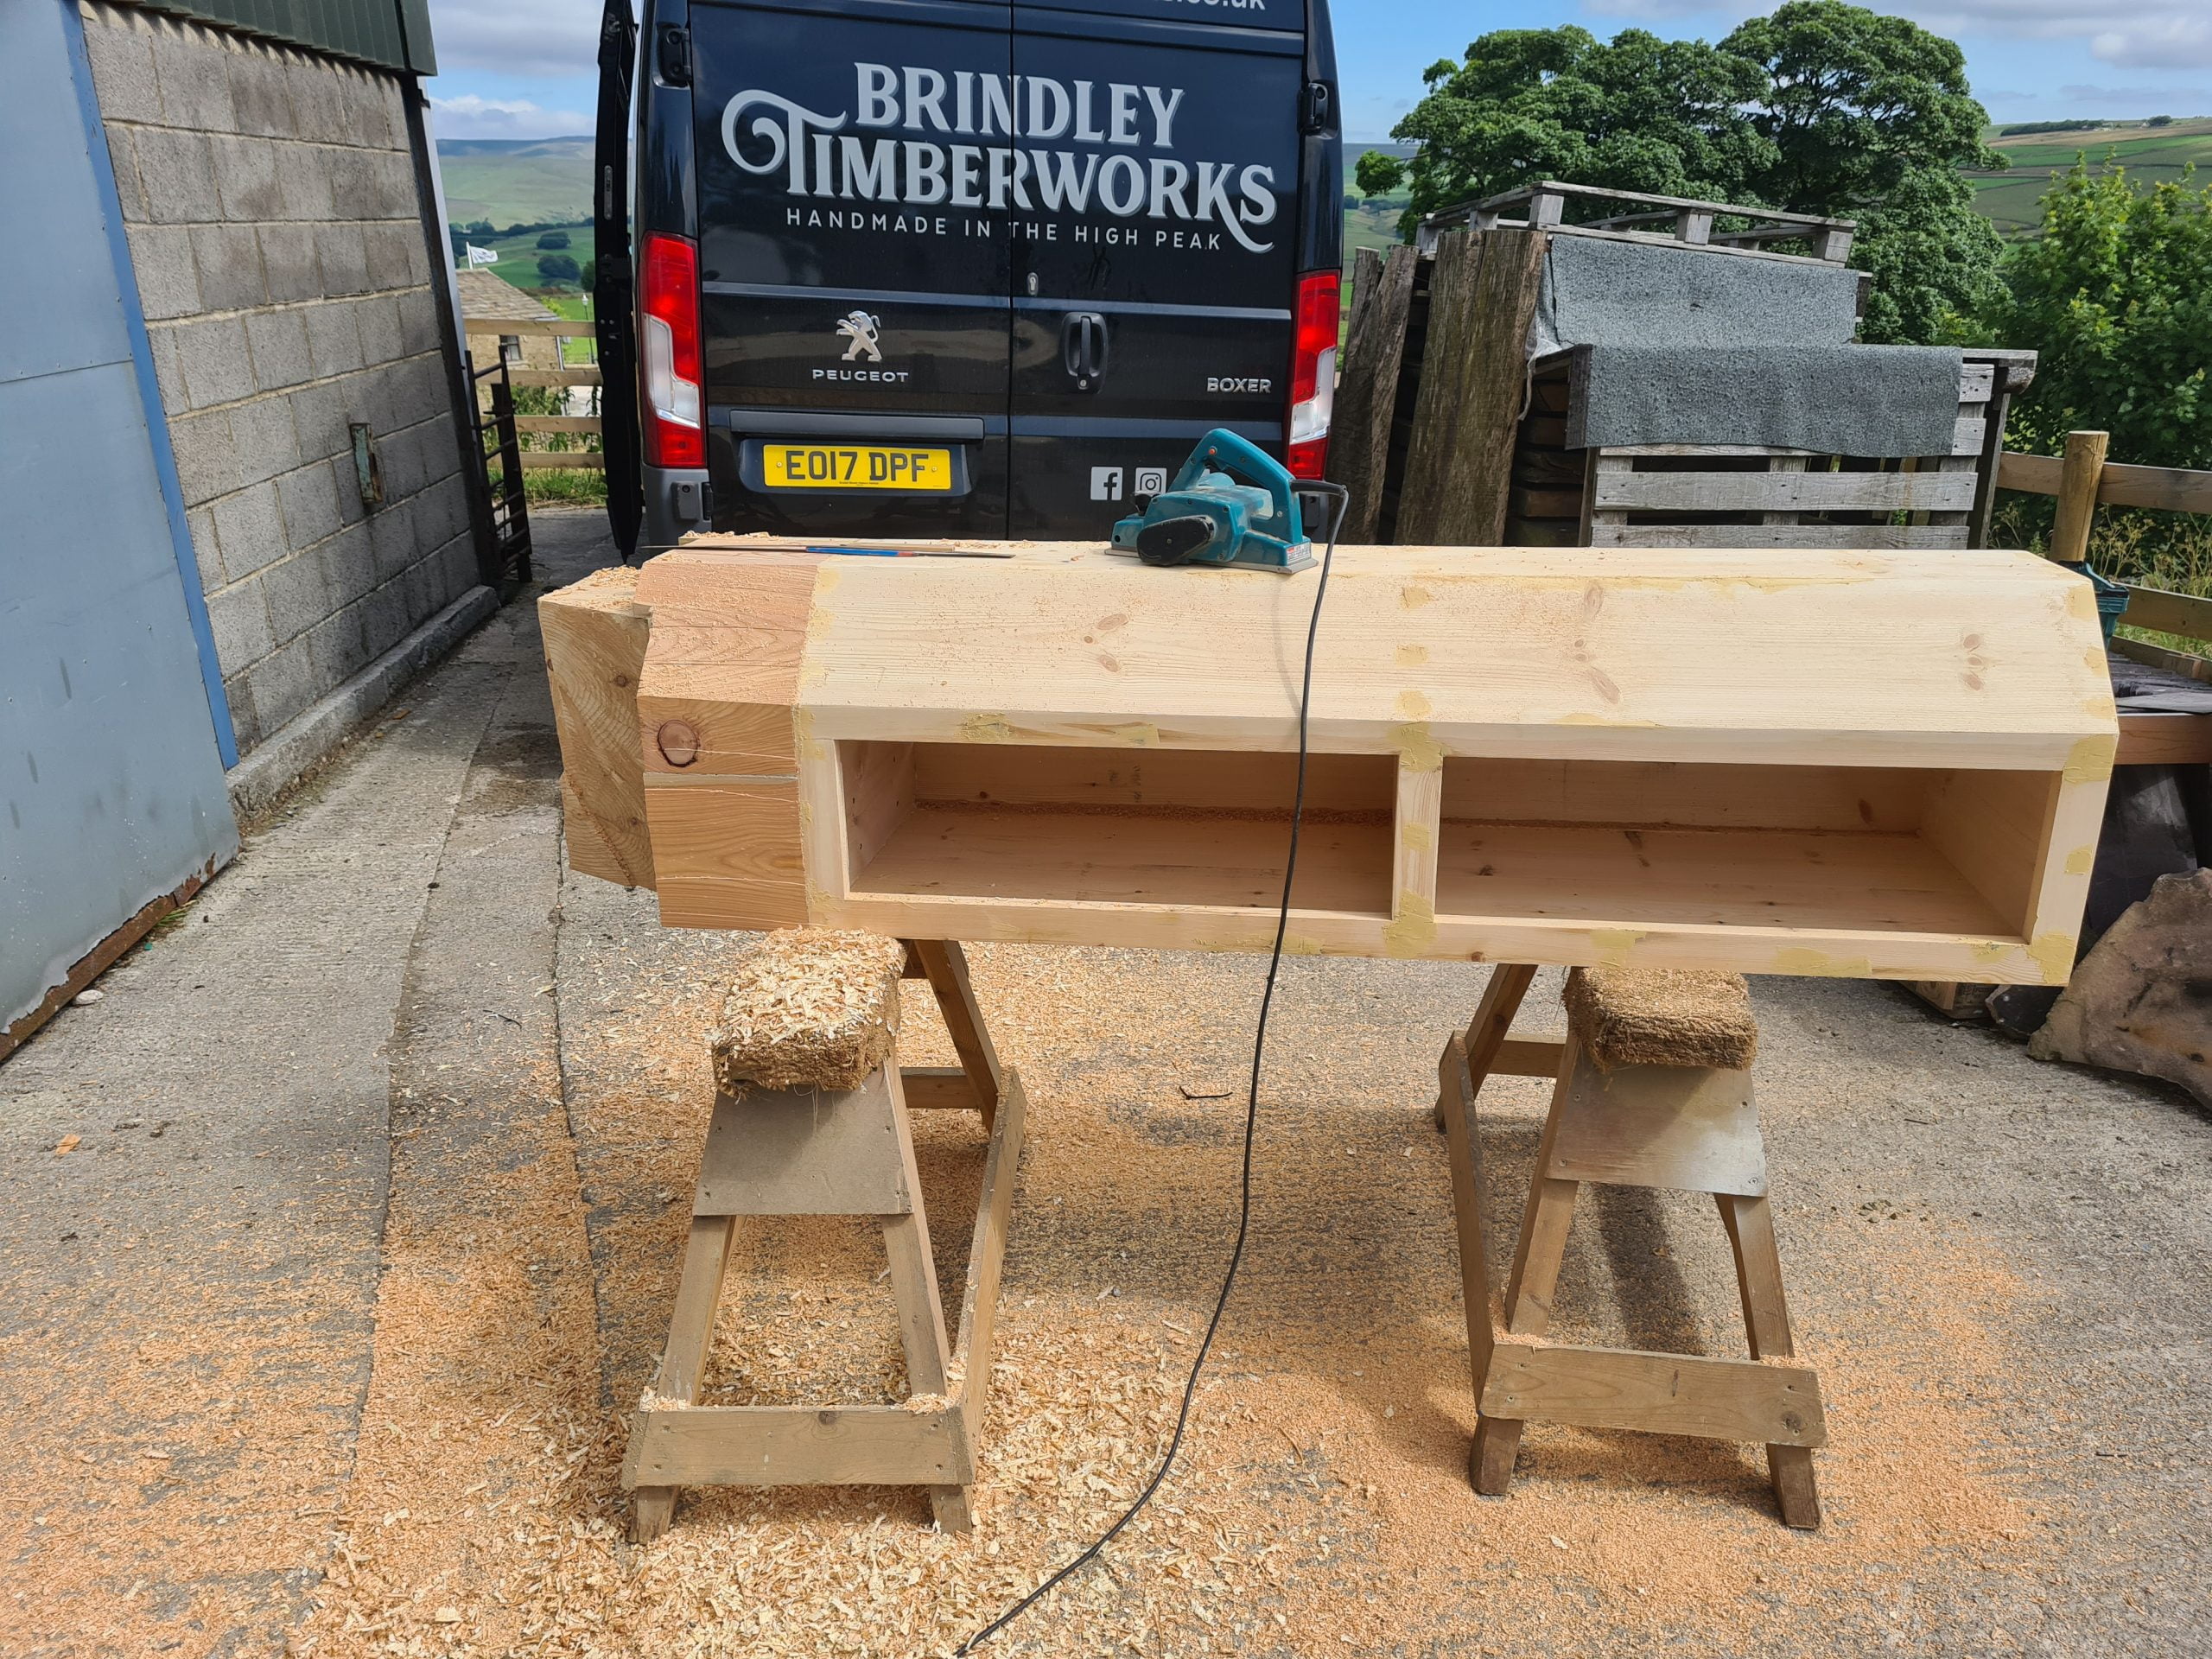
1. The main body;
2. The tip;
3. Final finishes and painting
The main body of the pencil was constructed by creating profile ribs. The pencil was then skinned in 28mm thick PEFC certified Scandinavian redwood. The wood was ripped at 22.5° and glued together. The last stage involved sanding the complete body and applying a filler dressing.
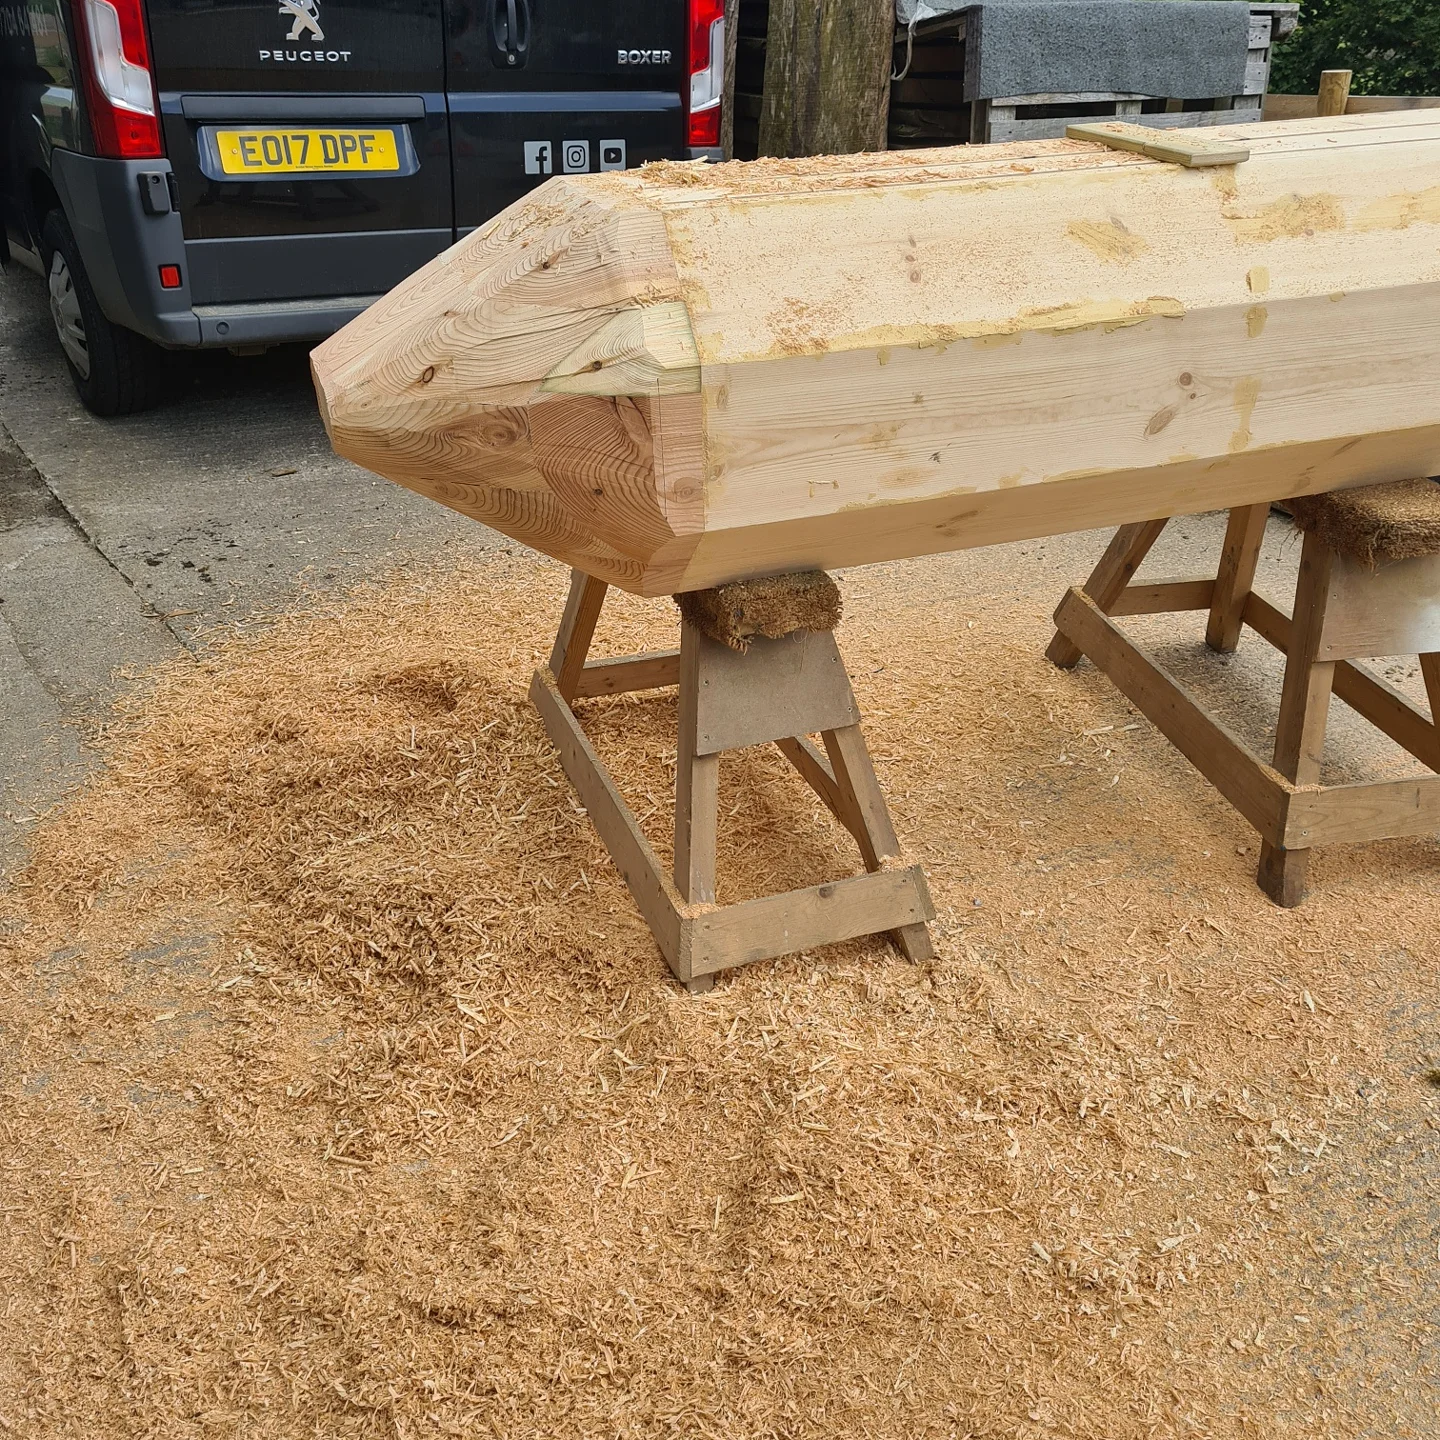
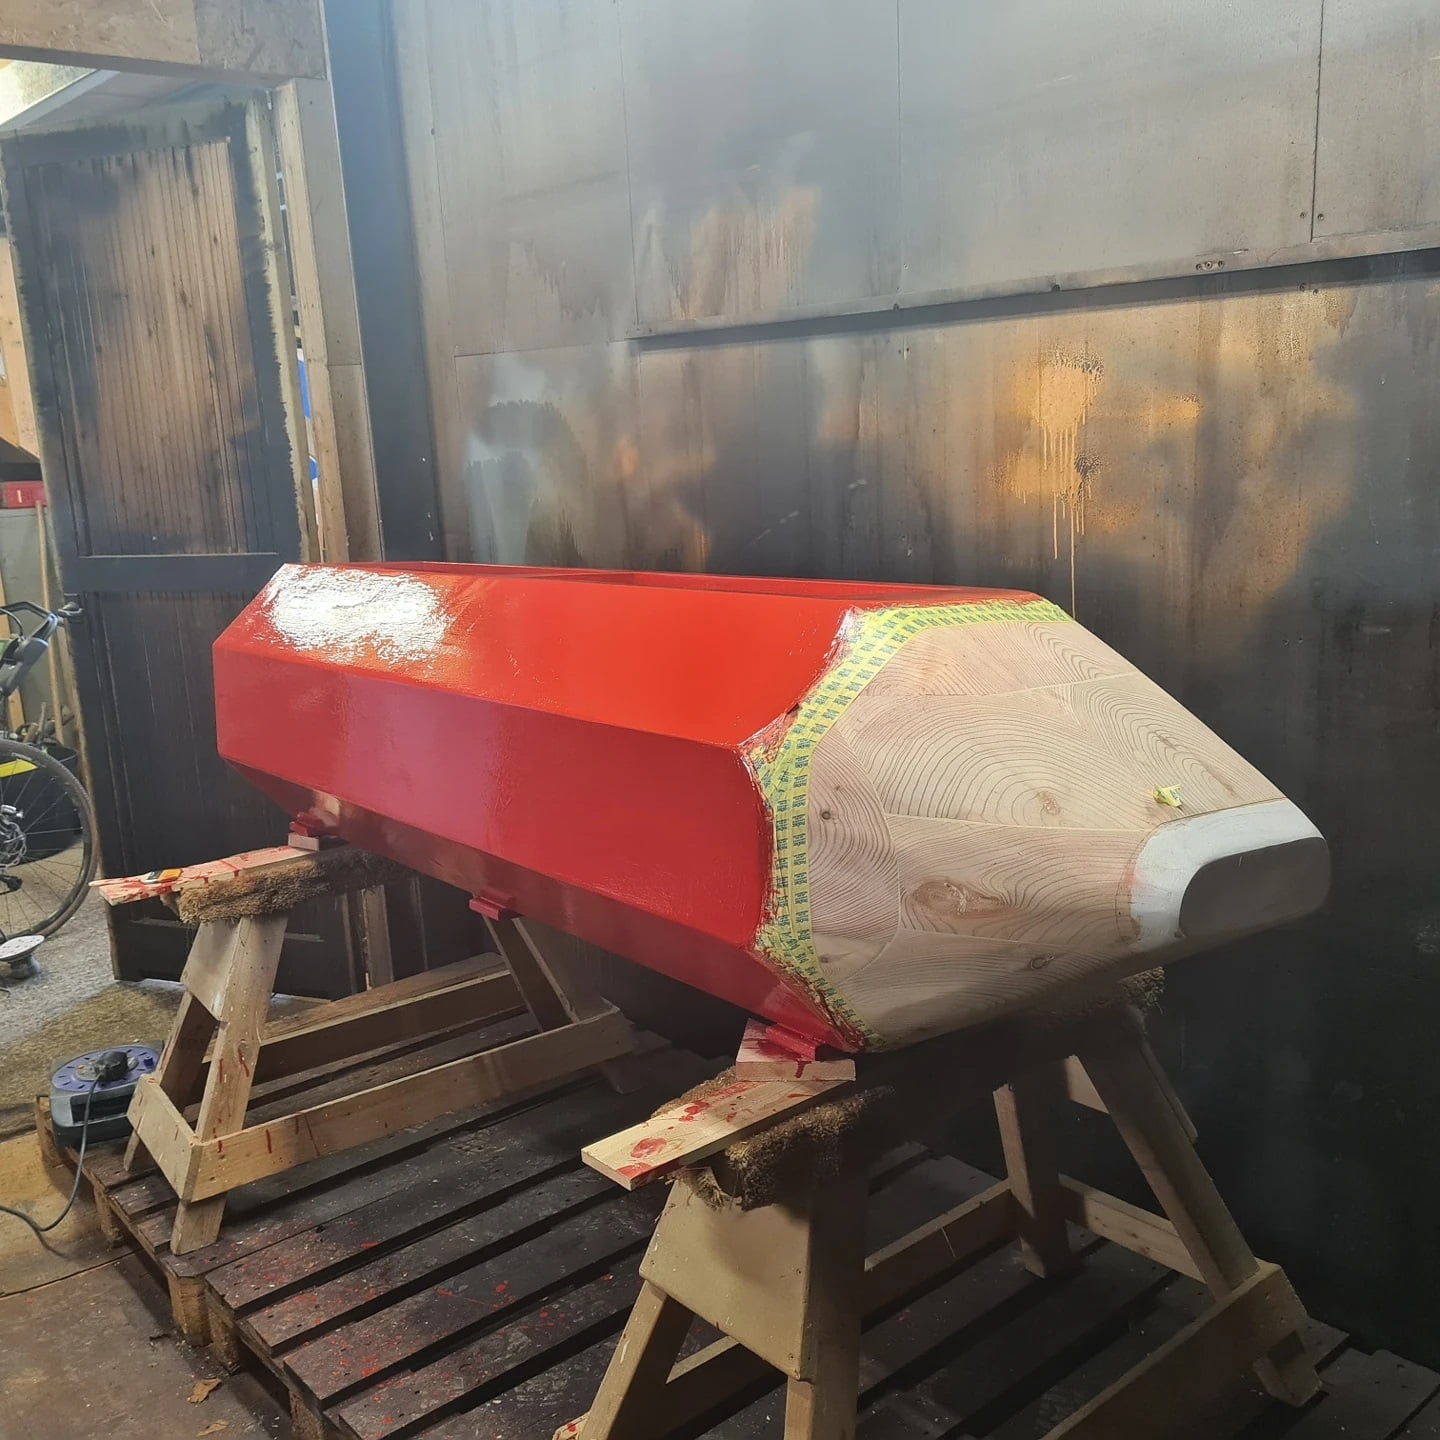
Made from a laminated block of larch, I would be lying if I didn’t say I was dreading carving the tip of the planter. After initially gluing up and fitting to the main body, it was left overnight to cure.

The next morning in the mid-summer sun and with a fresh mindset it was time to sharpen the pencil!! This was the most critical part as a single mistake could be catastrophic and waste hours of hard work. The time came to fire up the chainsaw and rough out the shape and remove the bulk of the waste. This was not before carefully marking out the areas to cut.
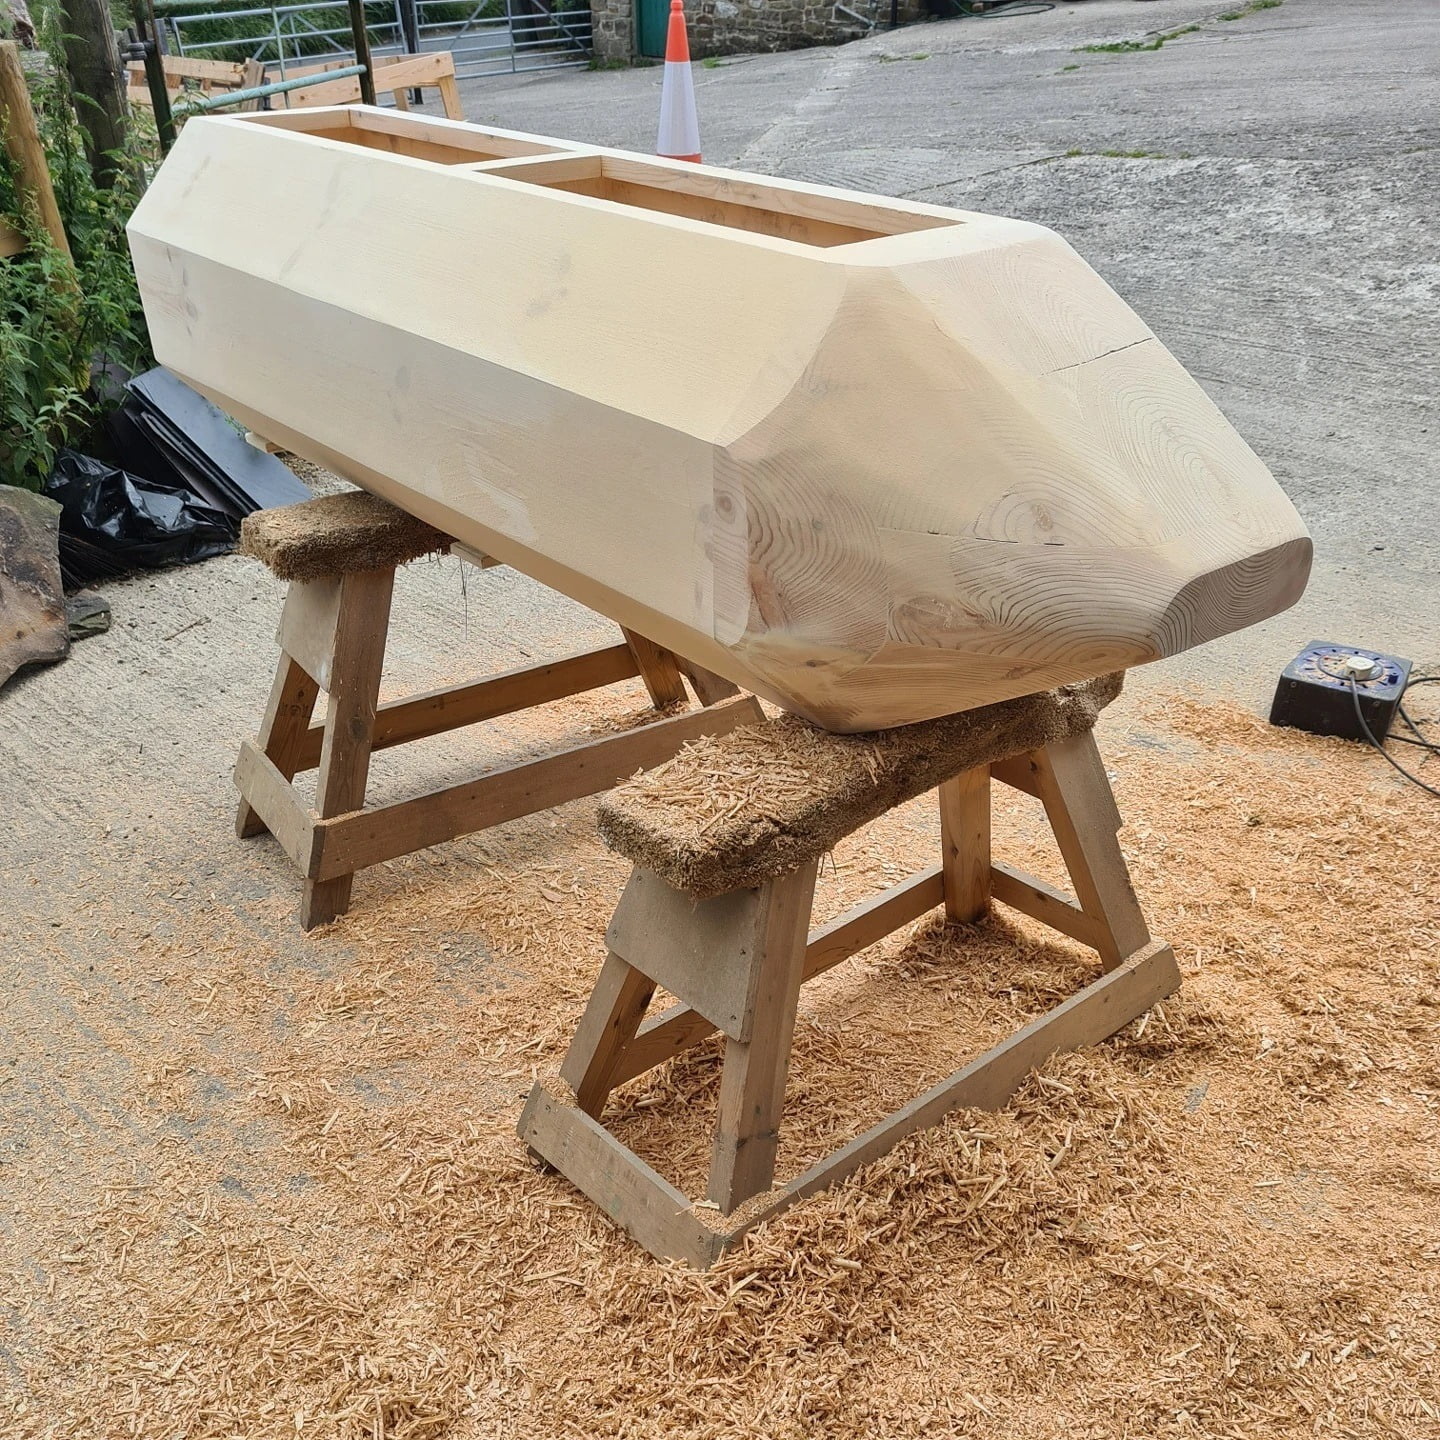
Sharpening the planter is a bit like using a big knife to sharpen your pencil at home. You can get the shape roughly right, but not perfect. Once it’s a much more manageable shape, I took an electric plane to flatten it further to my markings which I had drawn earlier. After more shaping with the planer, I sanded the tip, and honed the shape. Now it was ready for final finishing work and the filling of any gaps. The end result, arguably slower than sharpening a pencil at home, from measuring and marking, to cutting, plaining and finishing took me 4 hours.
Painting a pencil

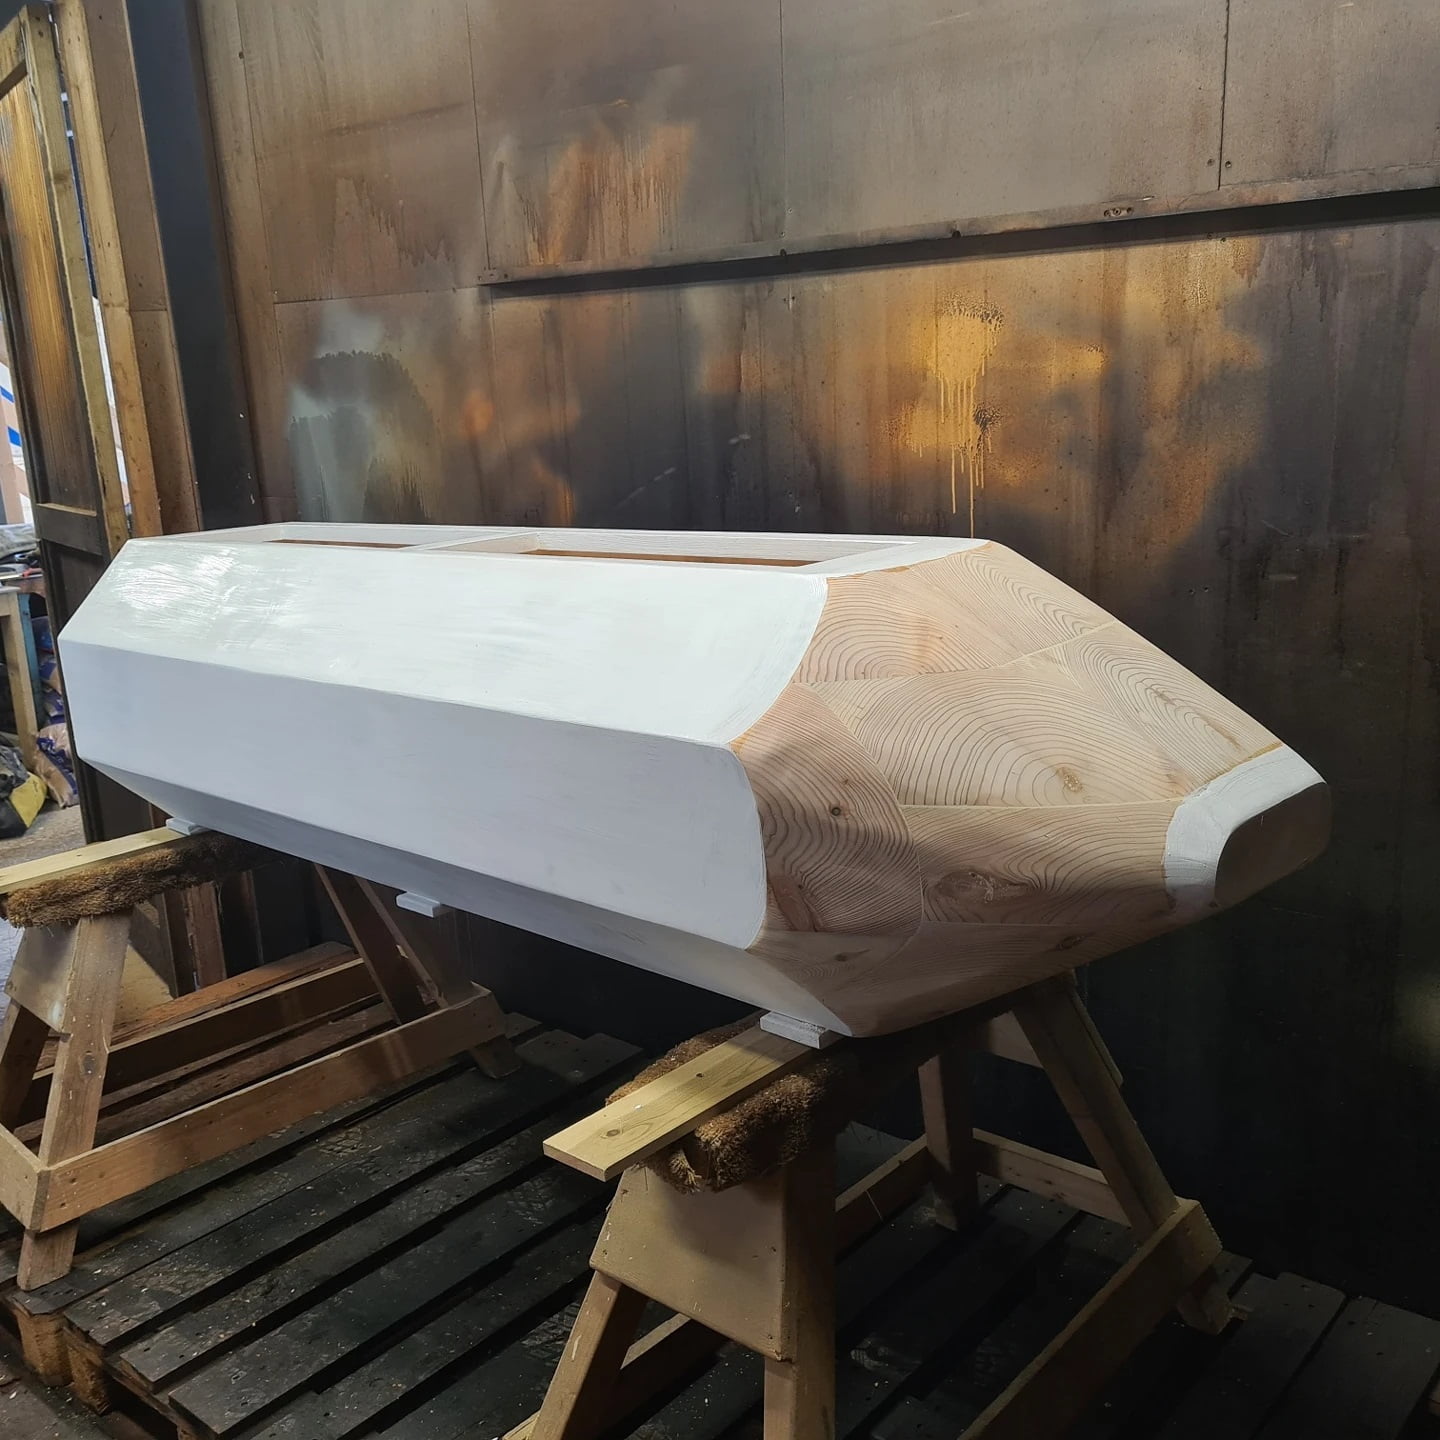
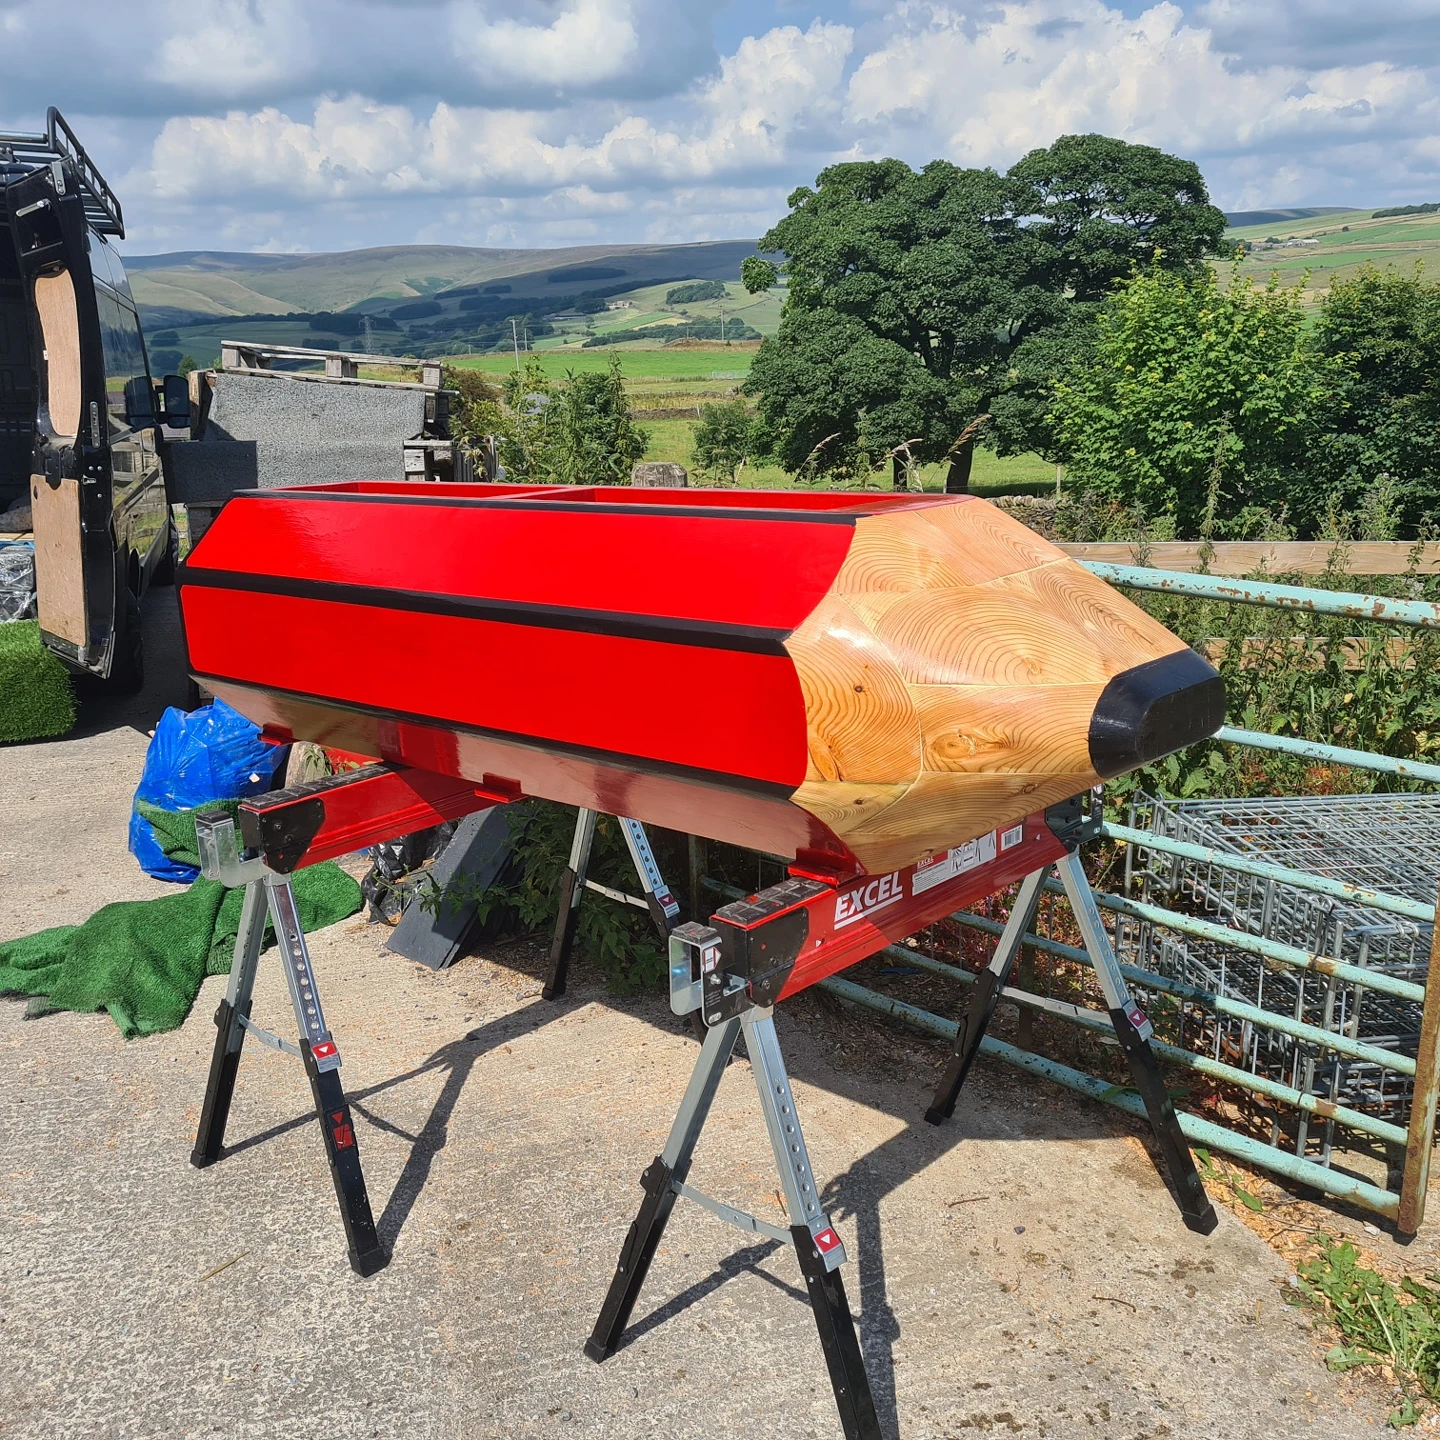
Although it was a long process, the painting was fairly straight forward. First, preservatives and knotting compounds were applied to make sure there were no future quality issues. To complete the build to a high standard I needed to cover and paint the pencil. In the end, I applied two coats of primer, two coats of red gloss, two coats of black gloss, and two coats of oil on the tip.
The planter was then lined with Visqueen membrane finishing the build, and ready for delivery to Sarah’s store in Wilmslow.
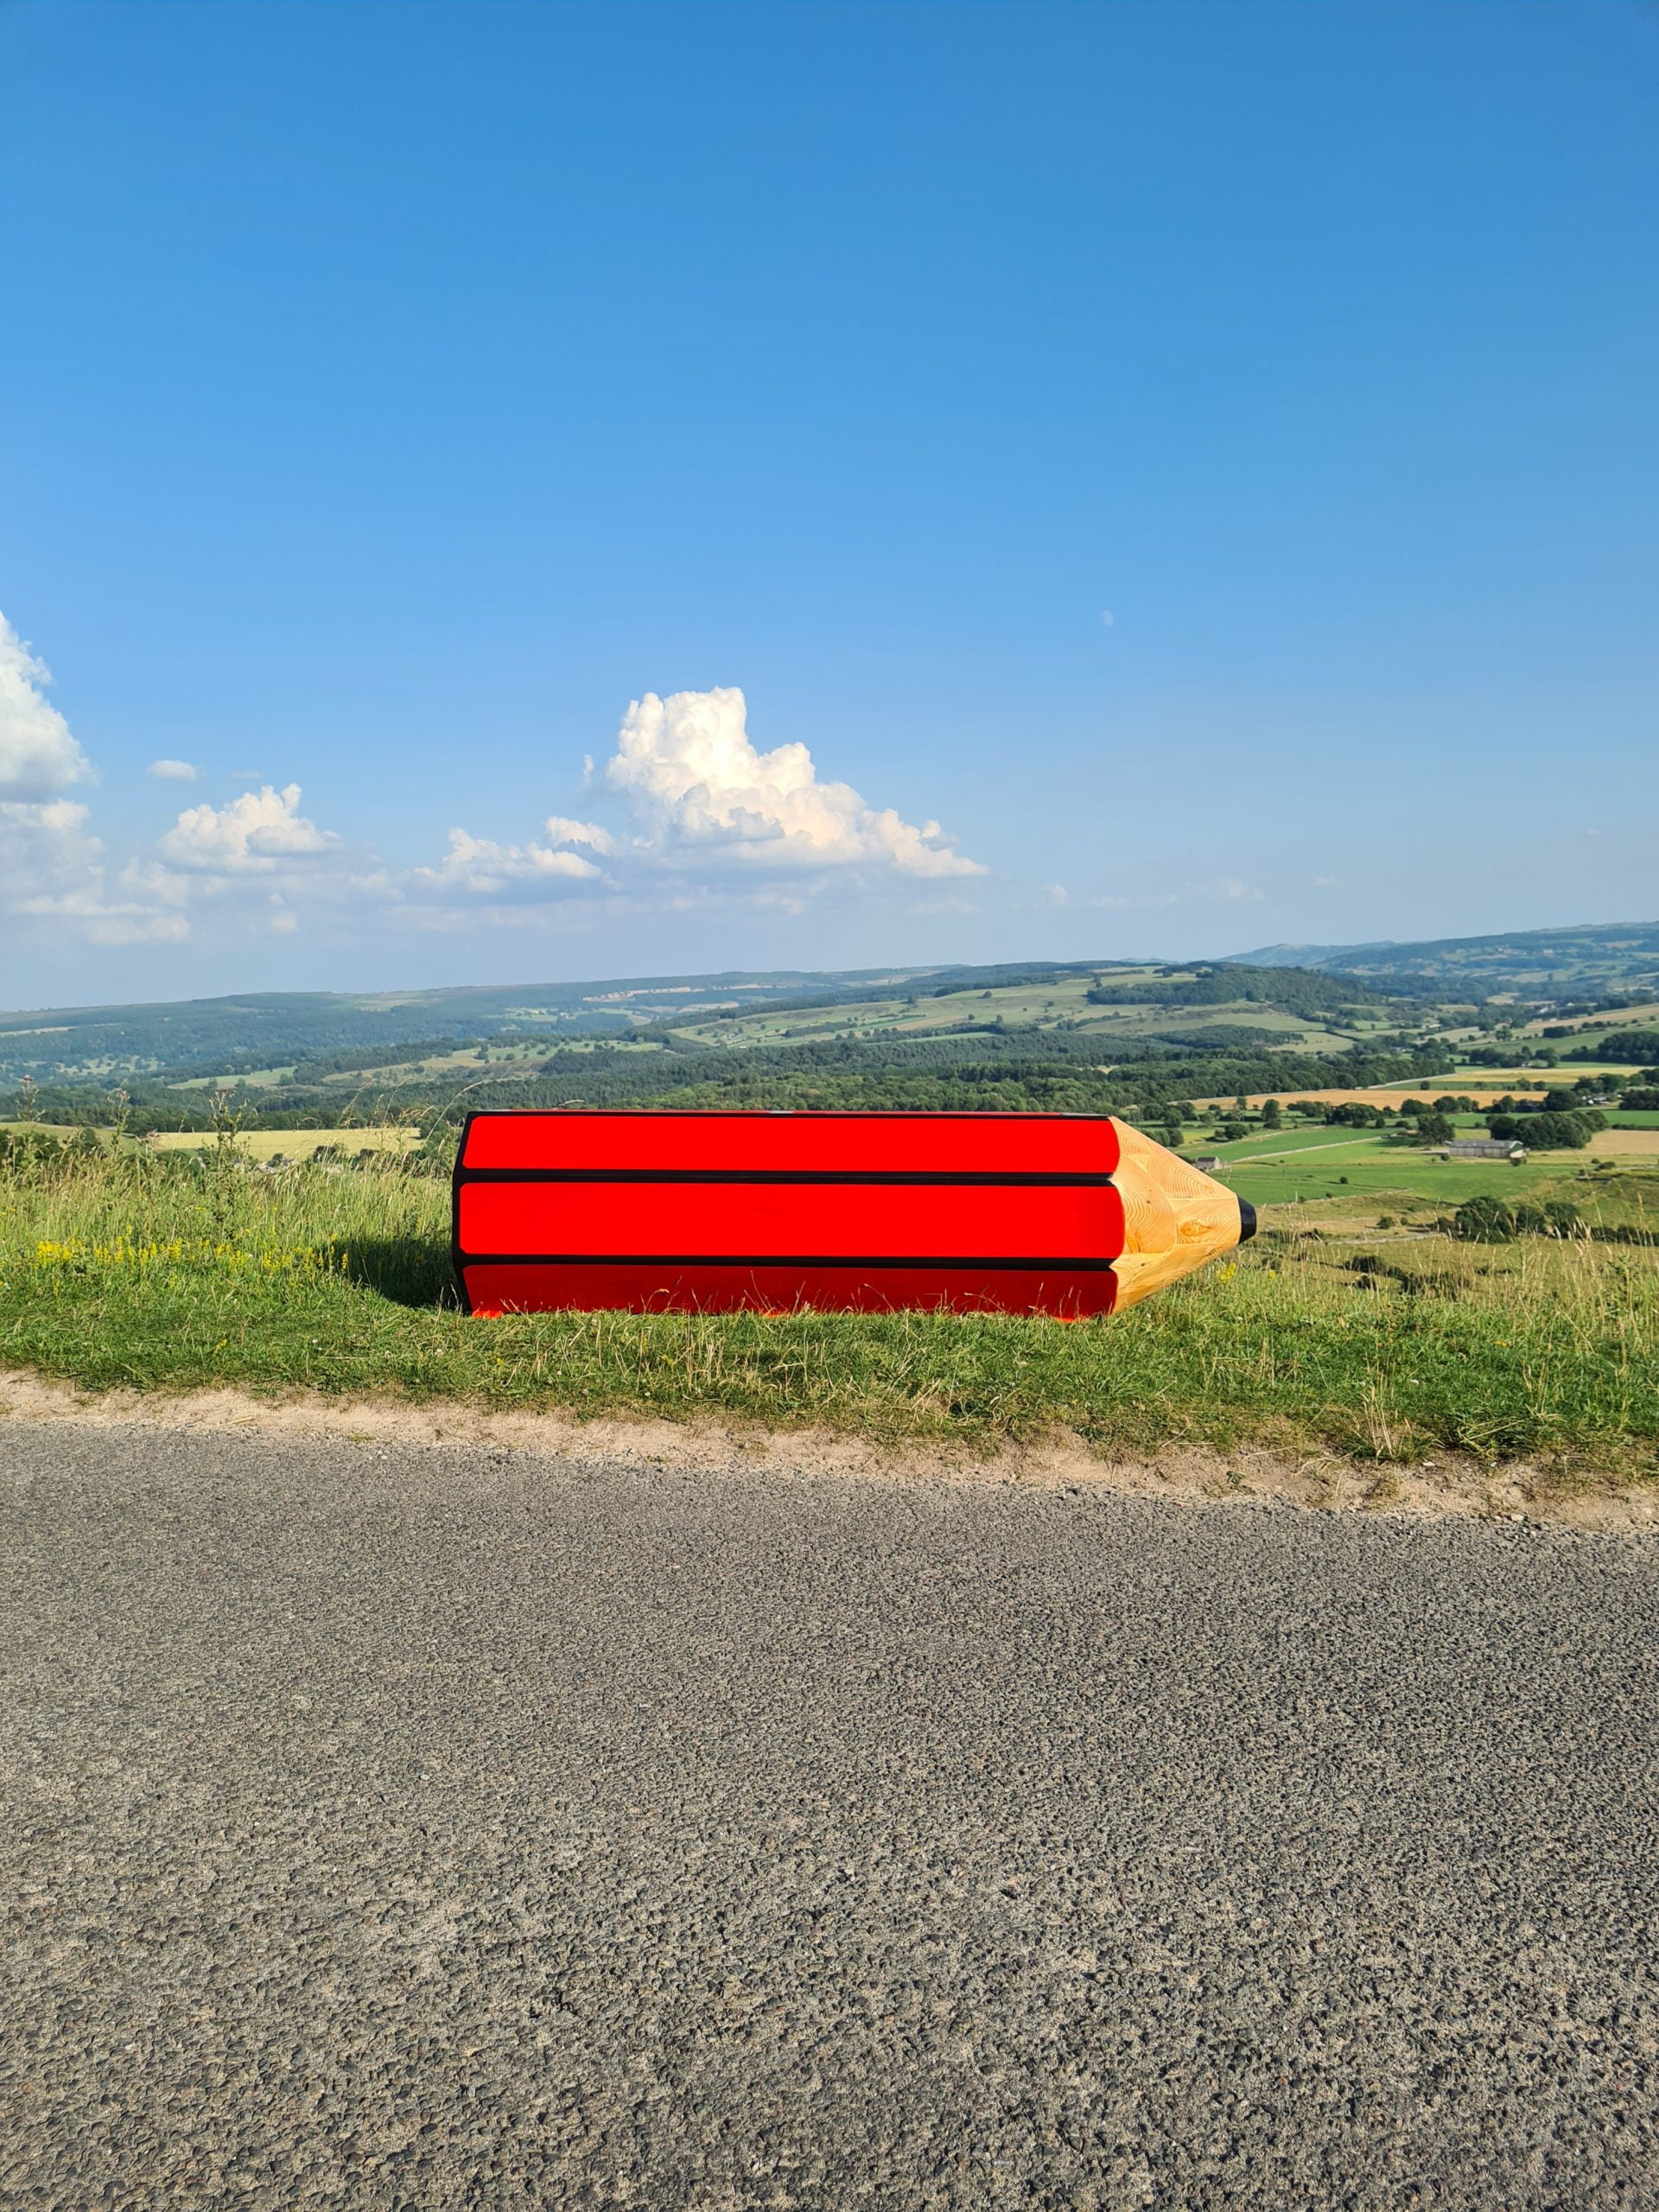
My nerves were now sky high to see if it would have the impact it needed. I’d kept Sarah in the loop with images and progress reports throughout, and the night before even went for a little road trip to Longstone Edge for a photo shoot.
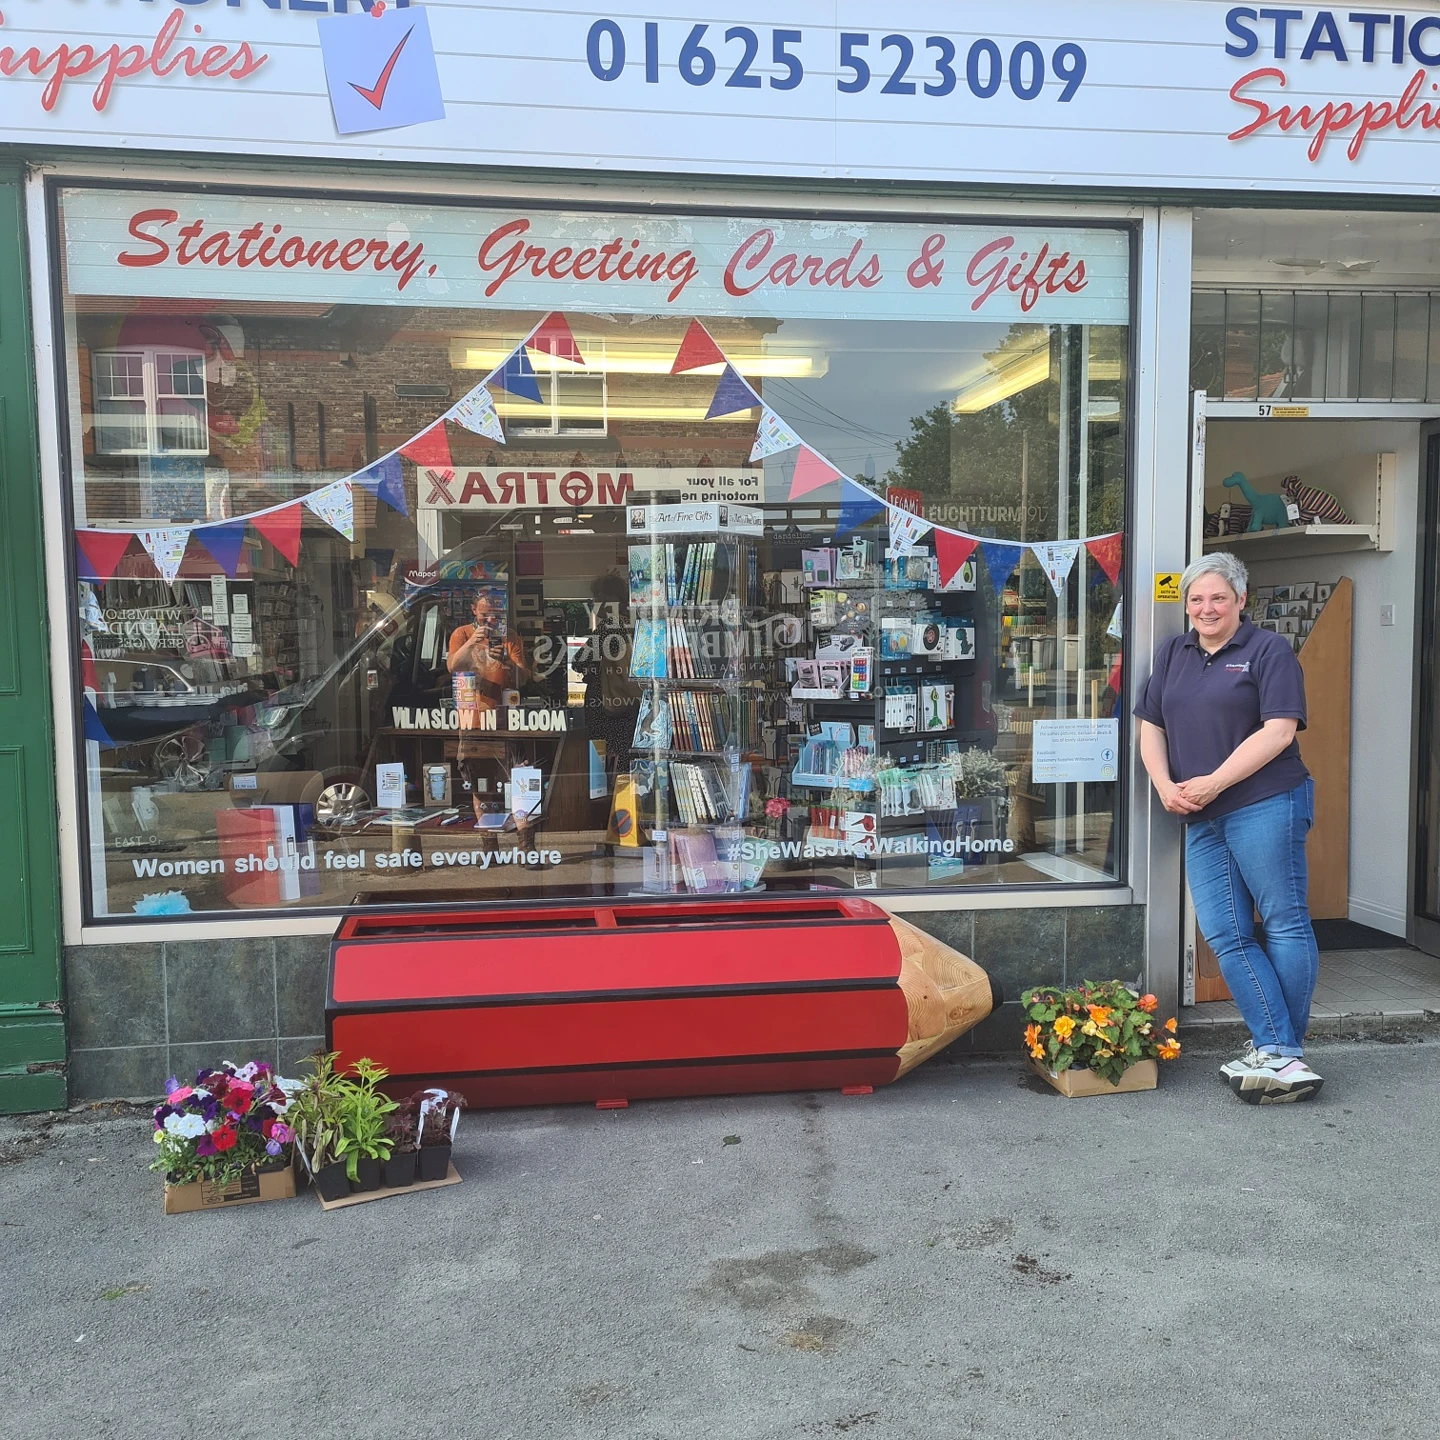
The morning of the delivery finally came. I drove carefully to Wilmslow with the huge planter in the back of my van. Arriving on site, I first noticed Sarah’s face, which was full of excitement. As I opened the van doors you could tell that she was delighted with the end result, and how it sat in front of her store.
I was delighted to hear that the pencil planter has gone down well on social media, having a huge number of positive comments, including from the official Staedtler UK social media account. Builds like this are not an everyday occurrence, but definitely keep my career choice entertaining and far from an everyday nine to five job.
I have included a gallery of the whole build below, from beginning to end. These can also be seen on my social media pages.
-Ben